Using TranslateTransition to animate a node

In the last two posts I showed you how to use the Timeline class to animate the node. Although it is good, there is a lot of coding that you need to do to move the nodes around. Instead, you can use the TranslateTransition class. This lets you move the nodes around very easily without having to write a lot of code.

TranslateTransition is one of the many Transition classes that you can use to apply animation to the Nodes without having to code too much. To ‘translate’ something means to move it from one place to another along an axis.


package blog;

import javafx.animation.Interpolator;
import javafx.animation.Timeline;
import javafx.animation.TranslateTransition;
import javafx.animation.TranslateTransitionBuilder;
import javafx.application.Application;
import javafx.scene.Scene;
import javafx.scene.SceneBuilder;
import javafx.scene.layout.Pane;
import javafx.scene.paint.Color;
import javafx.scene.shape.Rectangle;
import javafx.scene.shape.RectangleBuilder;
import javafx.stage.Stage;
import javafx.util.Duration;

public class TheTranslateTransition extends Application {
	
	Pane pane;
	Scene scene;
	Rectangle rect;
	TranslateTransition translate;
	
	@Override
	public void start(Stage stage) throws Exception {
		pane = new Pane();
		
		scene = SceneBuilder
				.create()
				.root(pane)
				.width(600)
				.height(300)
				.build();
		
		rect = RectangleBuilder
				.create()
				.width(100)
				.height(50)
				.stroke(Color.SLATEGREY)
				.fill(Color.WHITESMOKE)
				.build();
		
		translate = TranslateTransitionBuilder
					.create()
					.duration(new Duration(5 * 1000))
					.node(rect)
					.toX(400)
					.autoReverse(true)
					.cycleCount(Timeline.INDEFINITE)
					.interpolator(Interpolator.EASE_BOTH)
					.build();
		
		pane.getChildren().addAll(rect);
		
		stage.setScene(scene);
		stage.sizeToScene();
		stage.show();
		
		translate.play();
	}
	public static void main(String[] args) {
		Application.launch("blog.TheTranslateTransition");
	}
}


Instead of moving a Text node around, I am choosing to move a javafx.scene.shape.Rectanglenode around. It is created using *wait for it* RectangleBuilder. It has a width of 100 pixels and a height of 50 pixels, a slate-grey stroke and smoke-white fill.

Now comes the heart of this post – TranslateTransition. The TranslateTransitionBuilder class lets you create a TranslateTransition. The duration() lets you specify the complete duration of the animation. As you know from the previous post, autoReverse() lets you specify whether you want the animation to be played backwards or not. The cycleCount() lets you specify how many times you want the animation to play. Since my rectangle is going to be moved around the X-axis, I am using the toX() method which allows me to define the X coordinate to which the rectangle should be translated. You could very well use toY() and toZ() if you want to translate it along a different axis. The interpolator() allows you to pass an interpolator which will calculate the intermediate values of the animation. There are many built-in interpolators which you can pass in; I passed the EASE_BOTH interpolator. This causes the animation to be slow in the start, accelerate in-between and then slow down again towards the end. The built-in interpolators are available as static fields of the javafx.animation.Interpolator class.

The output below shows how the rectangle moves:
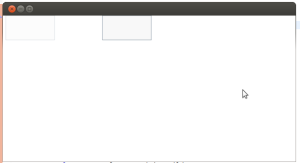
TranslateRectangle

Using Timeline class to Animate a Node – Part 2

As I mentioned in my last post, this post is about controlling the animation by using the methods of the Timeline class. The example from the previous post has been modified to include a GUI. I will not discuss the GUI here because that is the subject of later posts to come. The focus of this post is on using the appropriate methods of the Timeline class and adding listeners to KeyFrames to change the fill color of the text.

The code is given below. I have collapsed the code because it is slightly long.

package blog;

import java.util.ArrayList;
import java.util.List;
import java.util.Random;

import javafx.animation.KeyFrame;
import javafx.animation.KeyValue;
import javafx.animation.Timeline;
import javafx.animation.TimelineBuilder;
import javafx.application.Application;
import javafx.event.ActionEvent;
import javafx.event.EventHandler;
import javafx.geometry.Insets;
import javafx.geometry.Pos;
import javafx.scene.Scene;
import javafx.scene.SceneBuilder;
import javafx.scene.control.Button;
import javafx.scene.control.ButtonBuilder;
import javafx.scene.control.TextField;
import javafx.scene.control.TextFieldBuilder;
import javafx.scene.effect.Glow;
import javafx.scene.layout.HBox;
import javafx.scene.layout.HBoxBuilder;
import javafx.scene.layout.Pane;
import javafx.scene.layout.VBox;
import javafx.scene.layout.VBoxBuilder;
import javafx.scene.paint.Color;
import javafx.scene.paint.Paint;
import javafx.scene.text.Font;
import javafx.scene.text.Text;
import javafx.scene.text.TextBuilder;
import javafx.stage.Stage;
import javafx.util.Duration;

public class ControlTimelineAnimation extends Application{

	Text hello;

	TextField playFromDuration;
	Button playFrom;
	Button playFromStart;
	Button stop;

	Scene scene;
	HBox buttonHolder;
	Pane pane;
	VBox layout;

	Timeline timeline;
	KeyFrame startFrame;
	KeyFrame endFrame;

	List<paint> colors = new ArrayList<>();
	Random rand = new Random();

	@Override
	public void start(Stage stage) throws Exception {
		colors.add(Color.RED);
		colors.add(Color.GREEN);
		colors.add(Color.BLUE);

		buttonHolder = HBoxBuilder
				.create()
				.alignment(Pos.CENTER_LEFT)
				.build();

		pane = new Pane();

		layout = VBoxBuilder
				.create()
				.alignment(Pos.CENTER)
				.padding(new Insets(10))
				.build();

		scene = SceneBuilder
				.create()
				.height(500)
				.width(500)
				.root(layout)
				.fill(Color.GRAY)
				.build();

		hello = TextBuilder
				.create()
				.text("Hello")
				.stroke(Color.ANTIQUEWHITE)
				.fill(Color.WHEAT)
				.font(Font.font("Ubuntu", 41))
				.effect(new Glow())
				.id("hello")
				.build();

		playFromDuration = TextFieldBuilder
							.create()
							.promptText("From")
							.build();

		playFrom = ButtonBuilder
				   .create()
				   .text("Play From Durtation")
				   .build();

		playFromStart = ButtonBuilder
				        .create()
				        .text("Play From Start")
				        .build();

		stop = ButtonBuilder
				.create()
				.text("Stop")
				.build();

		startFrame = new KeyFrame(new Duration(0),
								  new KeyValue(hello.xProperty(),-200));

		endFrame = new KeyFrame(new Duration(5 * 1000),
				   new EventHandler<ActionEvent>(){
						@Override
						public void handle(ActionEvent arg0) {
							hello.setFill(colors.get(rand.nextInt(colors.size())));
						}
					},
				  new KeyValue(hello.xProperty(),700));

		timeline = TimelineBuilder
				.create()
				.keyFrames(startFrame,endFrame)
				.autoReverse(true)
				.cycleCount(Timeline.INDEFINITE)
				.build();

		layout.getChildren().addAll(pane,buttonHolder);
		pane.getChildren().add(hello);
		buttonHolder.getChildren().addAll(playFromDuration,
										  playFrom,
										  playFromStart,
										  stop);

		final Timeline tl = timeline;
		playFromStart.setOnAction(new EventHandler<ActionEvent>(){
			@Override
			public void handle(ActionEvent event) {
				tl.playFromStart();
			}
		});

		stop.setOnAction(new EventHandler<ActionEvent>(){
			@Override
			public void handle(ActionEvent event) {
				tl.stop();
			}
		});

		playFrom.setOnAction(new EventHandler<ActionEvent>(){
			@Override
			public void handle(ActionEvent event) {
				try{
					int duration = Integer.parseInt(playFromDuration.getText());
					tl.playFrom(new Duration(duration));
				}catch(Exception e){
					e.printStackTrace();
				}
			}
		});

		stage.setScene(scene);
		stage.sizeToScene();
		stage.show();
	}
	public static void main(String[] args) {
		Application.launch("blog.ControlTimelineAnimation");
	}
}

What I have in the code is a single Text node that I will move along the X-axis. I use Timeline class to animate the text and I use KeyFrames to specify what is going to change over a period of five seconds.

I have three Buttons whose names are self explanatory of what they do. I also have a TextField which lets you enter the duration from which the animation should play if you choose not to play the animation from the start.

I then add listeners to the three buttons. In the handle() of playFromStart button, I call the playFromStart() method of the Timeline instance. This causes the animation to play from the beginning. In the handle() of the stop button, I call stop() of the Timeline. This causes the animation to freeze wherever it is. If I call play() now, the animation will resume from where it stopped.

Finally, the TextField lets you enter the duration, in milliseconds, from where you want to play the animation. The idea is to get the text from the textfield, parse it to an int, and then pass it to the playFromDuration() method.

Another thing that I have added is a listener to the KeyFrame. The onFinish listener lets you know when the KeyFrame has finished its role in the animation. In my case, I am setting the fill color of the Text node every time it goes out of the window from the right side. When it comes back, it has a random color that I pick from the ArrayList<>. The listener is passed to the KeyFrame as the second argument to its constructor.

Using Timeline class to Animate a Node – Part 1

This post is about using the Timeline class to animate the Text nodes that I made in the Hello World example.

The concept of Timeline is similar to the timeline in Adobe’s Flash. You specify the key frames of the animation and the time when these key frames occur in the animation. The actual animation is done for you by the system.

In the example that I designed for this post, I will be moving the ‘Hello’ node up and down over a period of 5 seconds. The full code is given below. I will explain it in subsequent sections.

package blog;

import javafx.animation.KeyFrame;
import javafx.animation.KeyValue;
import javafx.animation.Timeline;
import javafx.animation.TimelineBuilder;
import javafx.application.Application;
import javafx.scene.Scene;
import javafx.scene.SceneBuilder;
import javafx.scene.effect.Glow;
import javafx.scene.effect.Reflection;
import javafx.scene.layout.Pane;
import javafx.scene.paint.Color;
import javafx.scene.text.Font;
import javafx.scene.text.Text;
import javafx.scene.text.TextBuilder;
import javafx.stage.Stage;
import javafx.util.Duration;

public class TimelineAnimate extends Application {
	Text hello;
	Scene scene;
	Pane pane;
	
	Timeline timeline;
	KeyFrame startFrame;
	KeyFrame endFrame;
	
	@Override
	public void start(Stage primStage) throws Exception {
		pane = new Pane();
		
		scene = SceneBuilder
				.create()
				.root(pane)
				.width(300)
				.height(300)
				.build();
		
		hello = TextBuilder
				.create()
				.text("Hello")
				.stroke(Color.ANTIQUEWHITE)
				.fill(Color.WHEAT)
				.font(Font.font("Ubuntu", 41))
				.effect(new Glow())
				.id("hello")
				.build();
		
		startFrame = new KeyFrame(new Duration(0), 
								  new KeyValue(hello.yProperty(),400));
		endFrame = new KeyFrame(new Duration(5 * 1000), 
				  				  new KeyValue(hello.yProperty(),-100));
		
		timeline = TimelineBuilder
					.create()
					.keyFrames(startFrame,endFrame)
					.autoReverse(true)
					.cycleCount(Timeline.INDEFINITE)
					.delay(new Duration(500))
					.build();
		
		
		scene.setFill(Color.BLACK);
		pane.getChildren().addAll(hello);
		primStage.setScene(scene);
		primStage.sizeToScene();
		primStage.setTitle("Hello World");
		primStage.show();
		
		timeline.play();
	}
	
	public static void main(String[] args) {
		Application.launch("blog.HelloWorld");
	}
}

The first line was slightly misleading because I am only animating one Text node. I have deleted the second node because it did not serve any purpose here. Back to the code now.

I have two instances of KeyFrame class named startFrameand endFrame. These are exactly what you think they are – the key frames of the animation. The idea is very simple: you specify at what durations these frames come in the animation and also what values of a node these key frames change. To specify the values in the key frames that will be changed, you need instances of class KeyValue. To specify at what time these frames will be played, you need instances of Duration class.

As you can see from the example, startFrame plays at zero seconds and the value that it changes is the y -coordinate of the hello node to 400. The endFrame plays at 5 seconds and sets the y-coordinate to -100. The result is the text moving out of the screen on both the sides.

Now to the actual timeline which is an instance of Timeline class. You create a Timeline by using the TimelineBuilder class. You pass the key frames using the keyFrames() methods as a comma separated list. autoReverse() specifies whether you want the animation to play backwards. I have set this to true so the text goes up and down instead of just going up. The cycleCount() method lets you specify how many times the animation will play. Setting it to Timeline.INDEFINITE will cause the animation to play incessantly; you can specify another number if you want. The delay() method lets you specify the delay before the animation starts playing. I have set this to half a second. You play the animation by calling the play() method after you have shown the stage on the screen. This is all for part one on the Timeline class. I will talk about controlling, starting, pausing the animation in subsequent post(s).

Getting Started With JavaFX — Hello World

All major IDEs provide support for JavaFX; some provide out-of-the-box support and some do not. For example, IntelliJ and NetBeans do while Eclipse does not. If you would like to work with JavaFX in Eclipse, you need the e(fx)clipse plugin.

You can get e(fx)clipse here: http://www.eclipse.org/efxclipse/install.html

You can get NetBeans here: https://netbeans.org/

You can get IntelliJ here: http://www.jetbrains.com/idea/

Once you are done with that, we can move onto a Hello World example. It will be a simple text “Hello World” displayed on the screen with some effects and colors.

package blog;

import javafx.application.Application;
import javafx.geometry.Pos;
import javafx.scene.Scene;
import javafx.scene.SceneBuilder;
import javafx.scene.effect.Glow;
import javafx.scene.effect.Reflection;
import javafx.scene.layout.HBox;
import javafx.scene.layout.HBoxBuilder;
import javafx.scene.paint.Color;
import javafx.scene.text.Font;
import javafx.scene.text.Text;
import javafx.scene.text.TextBuilder;
import javafx.stage.Stage;

public class HelloWorld extends Application {

	Text hello;
	Text world;
	Scene scene;
	HBox hBox;

	@Override
	public void start(Stage primStage) throws Exception {
		hBox = HBoxBuilder
			   .create()
			   .alignment(Pos.CENTER)
			   .build();

		scene = SceneBuilder
				.create()
				.root(hBox)
				.width(300)
				.height(300)
				.build();

		hello = TextBuilder
				.create()
				.text("Hello")
				.stroke(Color.ANTIQUEWHITE)
				.fill(Color.WHEAT)
				.font(Font.font("Ubuntu", 41))
				.effect(new Glow())
				.build();

		world = TextBuilder
				.create()
				.text("World")
				.stroke(Color.GRAY)
				.fill(Color.WHITESMOKE)
				.font(Font.font("Ubuntu", 41))
				.effect(new Reflection())
				.build();

		scene.setFill(Color.BLACK);
		hBox.getChildren().addAll(hello,world);
		primStage.setScene(scene);
		primStage.sizeToScene();
		primStage.setTitle("Hello World");
		primStage.show();
	}

	public static void main(String[] args) {
		Application.launch("blog.HelloWorld");
	}
}

Let’s examine the code section piece-by-piece, starting with the class declaration.

Every class that wants to display something needs to extend the javafx.application.Application class. This class provides the lifecycle methods for your application. The platform provides you with a Stage. The Stage is the top level container. In simple words, it is a standalone window. You can create more Stages later if you want.

Next we look at the variable declarations. There are two Text variables, an HBox variable and a Scene variable. Text lets you display text on the screen. HBox lets you arrange the components horizontally and the Scene is the container into which all your visible content is put.

We then override the start() method. This is the main entry point for your application.The parameter to this method is the Stage that the platform has created. Your initialization of Nodes and laying them out will be done here.

Next we initialize the variables using appropriate Builder classes. Every Node has a corresponding Builder class. So, Text has a TextBuilder and HBox has HBoxBuilder. Let’s examine the initialization of Text using TextBuilder.

hello = TextBuilder
				.create()
				.text("Hello")
				.stroke(Color.ANTIQUEWHITE)
				.fill(Color.WHEAT)
				.font(Font.font("Ubuntu", 41))
				.effect(new Glow())
				.build();

You begin by calling the create() method which creates a new Text instance. You set the text that it is supposed to display as an argument to text(). The stroke() defines the color of the outline of the text. The argument to fill() defines color in which the text will be displayed. You can specify the font by calling the static Font.font() method which creates a javafx.scene.text.Font object that is passed to the font() method of the Builder class. The effect() lets you specify some really cool effects. In one instance I have used Reflection and in other instance Glow. Finally, you call the build() method which returns a Text with all these properties you stated.

HBox and Scene are created by using their appropriate Builder classes. The alignment() of HBox defines how the components that it contains are positioned. It accepts a constant from the Pos Enum to define the alignment. The HBox is then made the ‘root’ of the Scene. You can say that the root is akin to content pane of a JFrame. Just as you would put your contents in the content pane of a JFrame, you put your components in the ‘root’ of the Scene.

You add the components to the HBox by first calling the getChildren() method of the HBox instance. This returns a list of all the components in the HBox. You then cal the addAll() method which allows you to specify all the components you want to add to it as a comma separated list. The order in which children are added is the order in which you pass them to addAll().

Everything is now ready to be displayed. To display your Scene, you add it to the Stage by calling the setScene() of the Stage that was passed to you by the platform. The sizeToScene() method adjusts the size of the window to display your Scene properly. You then call the show() method to make the Stage visible.

Finally it is time to put it all into action. In the main() method you call the Application.launch() method which takes the fully qualified name of the class that extends Application.

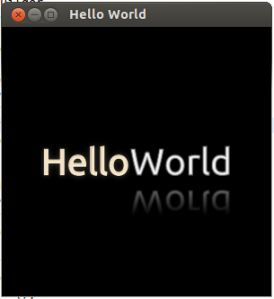
The output is given below:

HelloWorld

Why would you want to use JavaFX ?

I admit that I am inspired by Simon Sinek and his Start With Why movement. According to Sinek’s ‘Golden Circle’, the very first question that should be asked before doing anything is Why followed by How and What. So before I post any article on how to actually work with JavaFX 2.0 I would like to point out why you would want to learn JavaFX 2 .0.

Chris Oliver’s motivation behind creating F3 Script (later renamed to JavaFX) was to integrate people into the business process. To bring people into the business process you need to let them interact with the system via GUI. It is thus imperative to create an appealing GUI that caters to the needs of the users and lets them do their tasks effectively. JavaFX lets you do just that. It lets you create great GUI without much effort.

Listed below are the reasons why you would want to learn JavaFX.

First, the JavaFX Script is gone. JavaFX 2.x has all the familiar Java syntax. This allows you to unleash your Java skills and create amazing GUI with a very gentle learning curve.

Second, you can create your GUI using FXML. This allows you to separate the GUI from behavior. JavaFX uses FXML which is an XML-based markup language. Swing never offered any such facility. The advantage of using FXML is that the scene graph is much easier to understand and maintain.

Still if you want to make the GUI in code then there are the powerful Builder classes which allow you to create the various Nodes. Nodes are the JComponent of JavaFX. Every Node has a corresponding Builder class. As an example, consider this:

Scene scene = SceneBuilder
				.create()
				.root(pane)
				.width(300)
				.height(300)
				.build();

This creates a Scene object with a width and height of 300 pixels and the root set to pane. Think of the root, for now at least, as the content pane of a JFrame.

Third, you can make the pretty GUI prettier by using CSS. You use CSS in JavaFX the same way you would in HTML and you have the added option of CSS-styling a single node or couple of nodes by specifying CSS style for them in your code as String.

Fourth, you have support for media like audio and video. The javafx.scene.media package allows you to create standalone desktop applications or applications that run in web pages. It has components which allow you to play audio and video clips.

Fifth, you can animate the Nodes using a variety of animations like translation, rotation, etc. Although this is possible in Swing, the code required to do that would be a little involved. In JavaFX you just specify how you want to animate, which node you want to animate, the duration of the animation, the interpolation and so on. The rest has been taken care of for you.

Sixth, you can render HTML content directly in you application. The JavaFX WebView provides this functionality. WebView is based on the WebKit browser engine. WebView can be used to obtain a WebEngine object which allows you to do a wide array of things including executing JavaScript commands from your JavaFX application and getting back the result. Pretty cool , huh ?

Last but not the least, interoperability with Swing. For now, JFXPanel allows you to embed JavaFX nodes in Swing applications. With JavaFX 8 (version 3 JavaFX), there will be SwingNode which will allow Swing components to be used in JavaFX applications. So, there will be complete interoperability between the two; best of both the world.